

Since it hasn't been done and the instructions I have found from AllData were rather lack-luster, I made a guide for anyone who will need to replace their mode door actuator in a 2010+ Terrain/Equinox.
The symptoms were buzzing, clicking and lack of ability to change modes for the HVAC. Eventually, we were stuck with defrost 24/7. The replacement was easy as far as what needs done, but difficult because of the confined space and the positions you have to put your body in. I'm sore from head to foot with bruises everywhere trying to figure out how to get this thing out. You will benefit from my pain! It wasn't too bad considering the dash didn't have to come out, but it was still no fun!
From start to finish, it took about 3 hours. If I did it again, i could do it in about half that time.
Tools needed:
1/4" Ratchet with 7mm and 10mm sockets and approx 8" extension
3/8" Ratchet with extension and 10mm deep socket. (depending on your sockets)
Stubby flat head screwdriver
Phillips screwdriver
Needle nose pliers
Small flashlight
A heck of a lot of patience and maybe a spare skinny teenager if your favorite topic is dessert! ;D
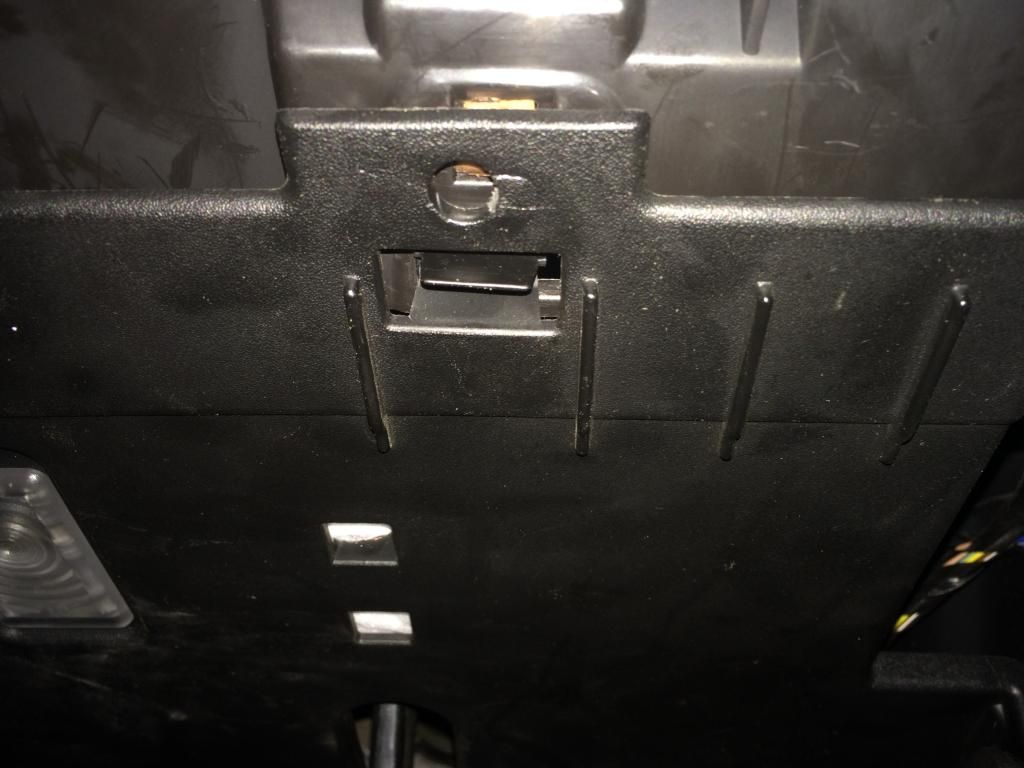
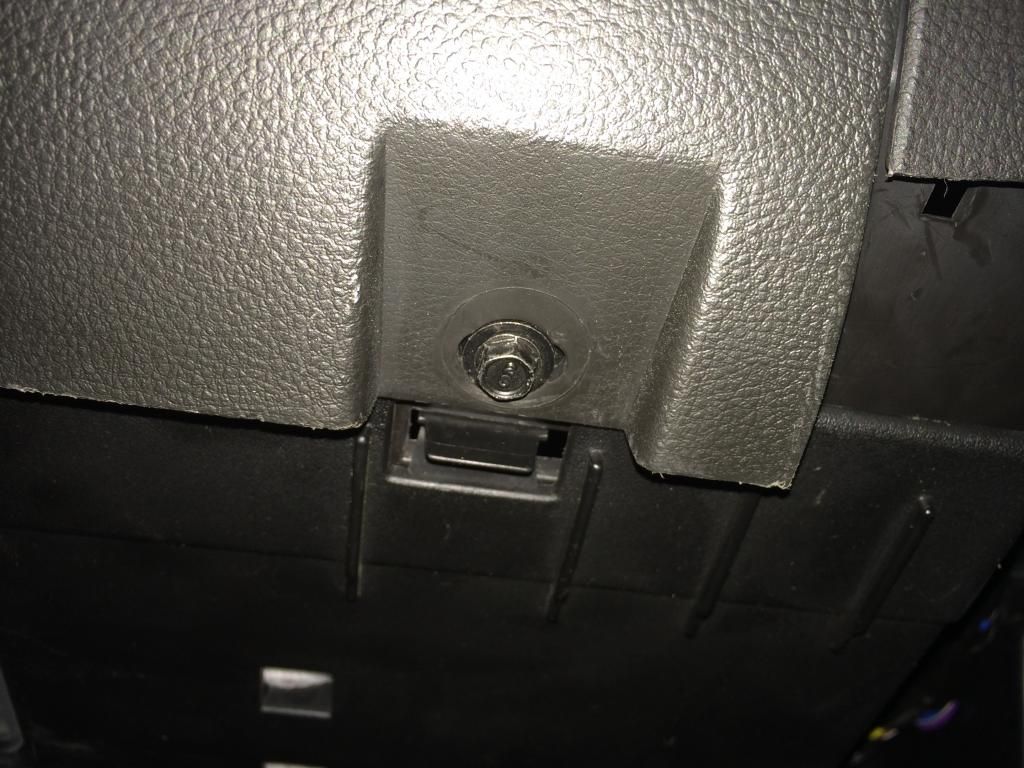
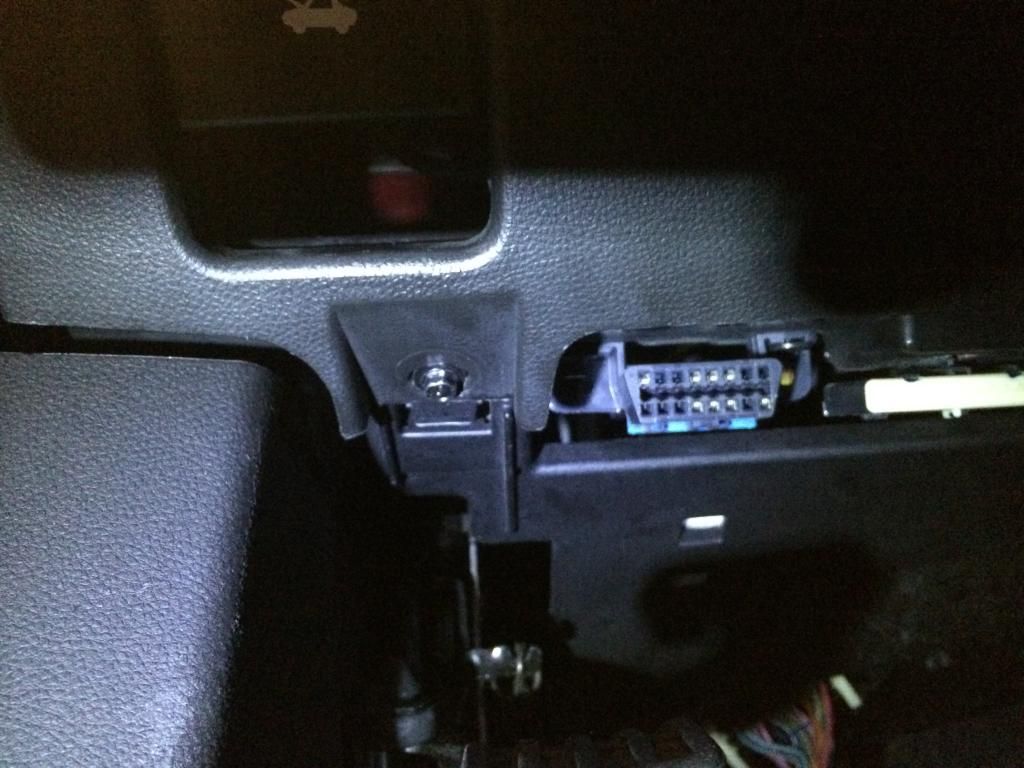
Using 7mm socket, remove two screws on either side of the drivers side knee panel. One near the OBDII port and the other on opposite side. When the screws are out, pull out horizontally (towards drivers seat) on all four corners and it will come loose. I left the hood release attached and set it aside hanging out of the door.
![Image]()
![Image]()
To remove the next panel holding the foot lamp, remove the screw in the middle using 7mm socket. In the picture, I already removed it. Once that screw is removed, squeeze the clips on either side of the panel and the front will come down.
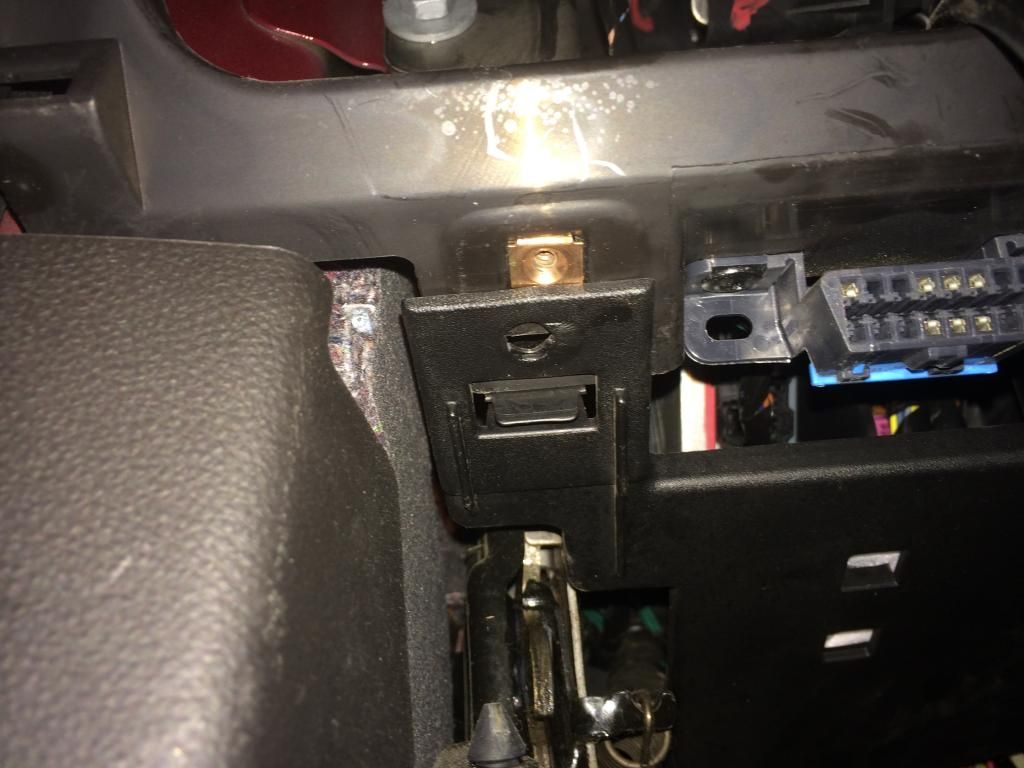
Disconnect the light bulb connector.
Using a 10mm deep well socket, ratchet and extension (1/4" or 3/8" -- whichever works best for you), there is a nut all the way in the back against the firewall. Remove that nut.
On the right hand side of the panel will be one of GM's worst inventions. The plastic retainer! Maybe a GM rep will take my vin# and "make a note" that these pins are terrible ideas. Grab your flat head screwdriver and pry out the middle pin half way. There is usually a small slot that your screwdriver will fit in. Use needle nose pliers to remove the rest of the pin.
Gently bend that panel back and you'll find yet another, more challenging retainer pin! Curse the General Motors namesake and it's designers. Then remove the second retainer pin.
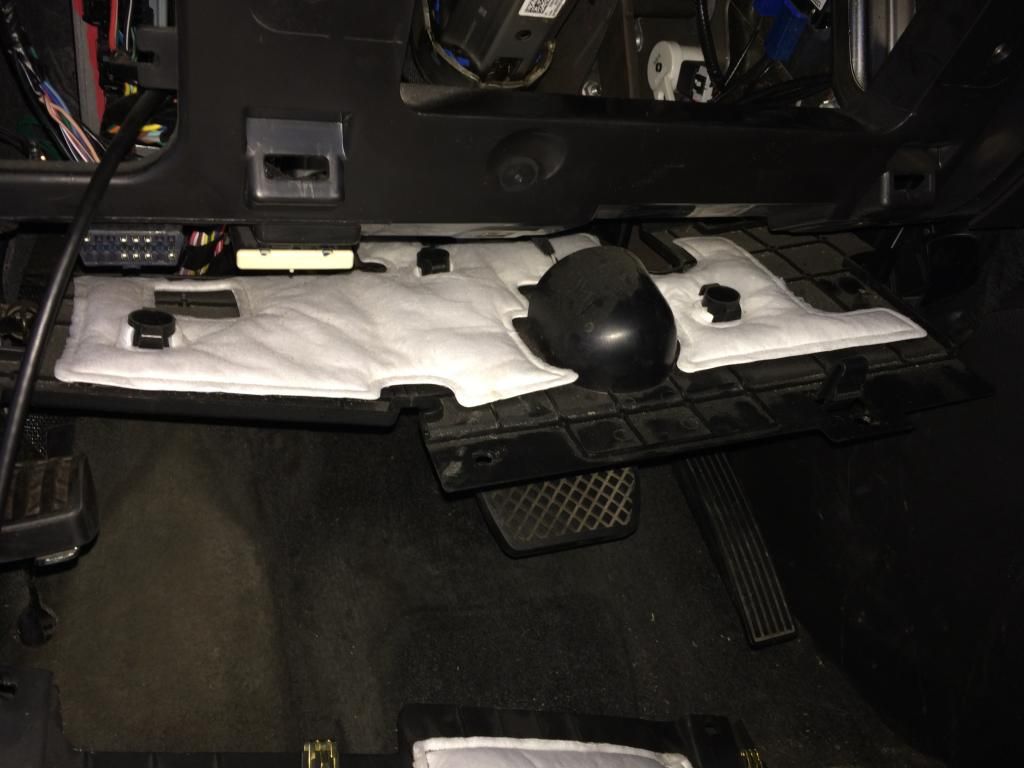
The panel should now be completely free. Gently remove it and place it somewhere where your dog doesn't run off with it and pee on it. It does have a bending point in it for what I assume is easier removal around the e-brake.
Remove 4 bolts holding the metal knee bolster on. Also place in secure location from urinating dogs/children.
Now... here is where we start the fun part! If needed, this is a good time to stretch, practice yoga, or release your flexible teenager from the dungeon. If you don't have access to said resources, take a deep breath while trying not to inhale a year worth of McDonald's French Fries, goldfish and 5lbs of road salt. For me, it worked best if I had the driver's seat as flat as it could go and laid on it backwards. Head resting against brake pedal and feet resting on the headrest (BAHAHA! get it? Headrest? Feet?....)
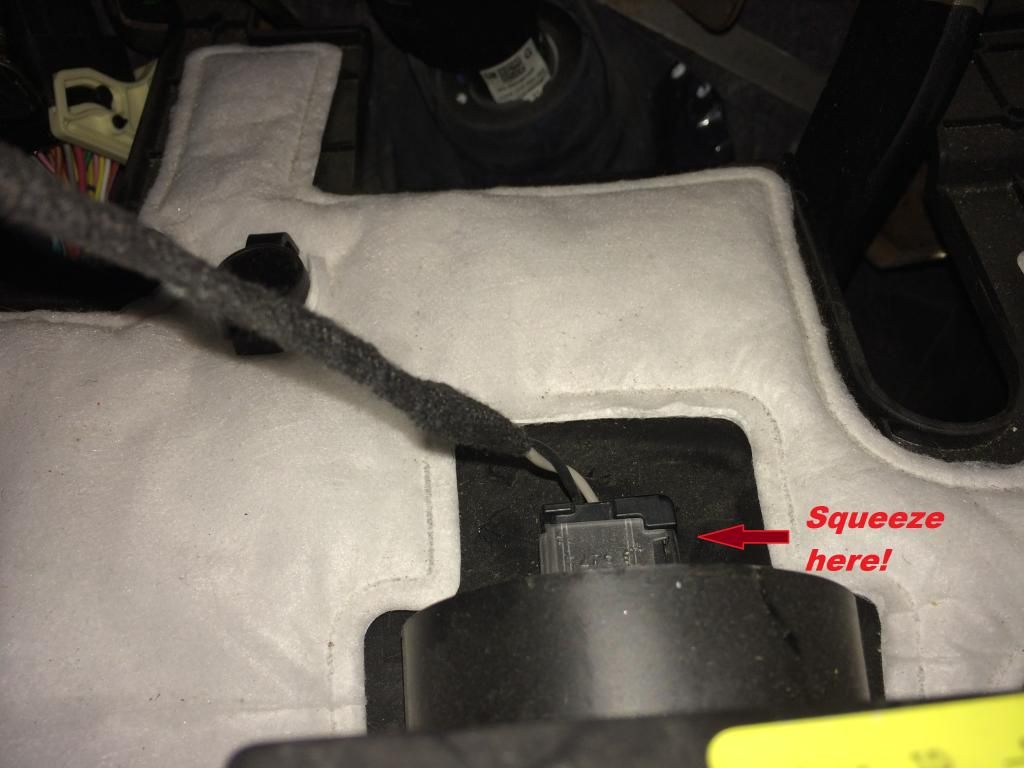
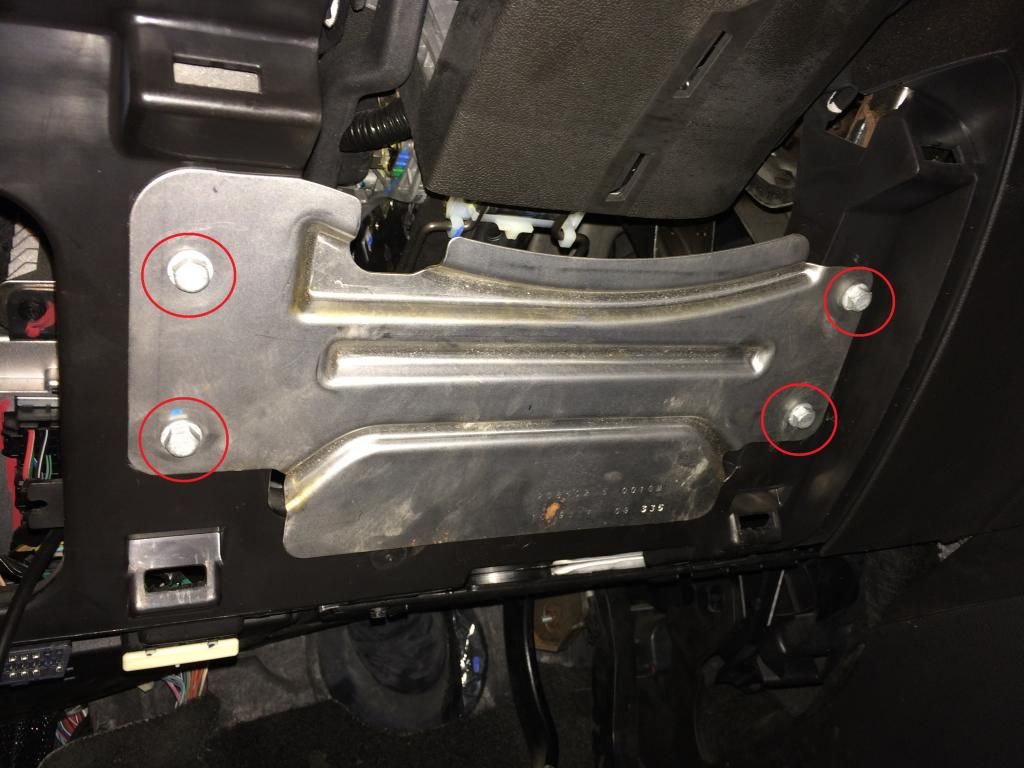
Using 10mm socket, remove two bolts holding the communications module in place.
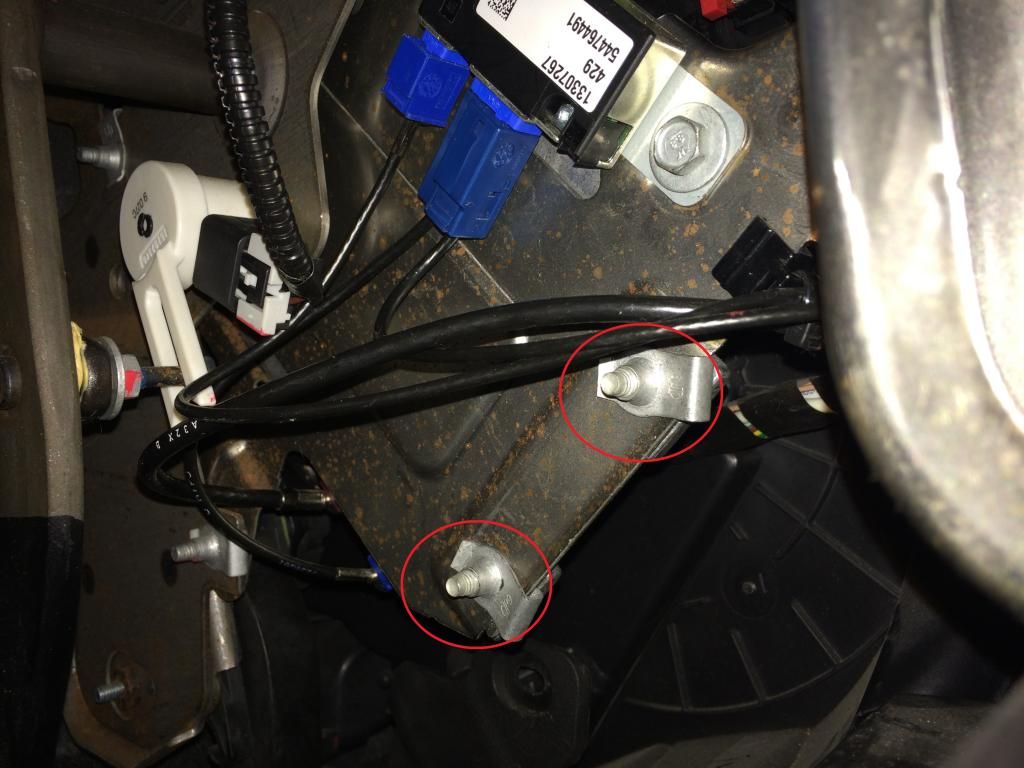
If you can, GENTLY disconnect the two square, blue wiring connectors. If they don't budge easily, leave them alone. This is your NAV, bluetooth, radio, on star, etc. Once the two bolts are removed, the module will be able to slide down. It will not come all the way out because there are more wire harnesses at the top side. Just slide it out 4-5 inches and let it chill.
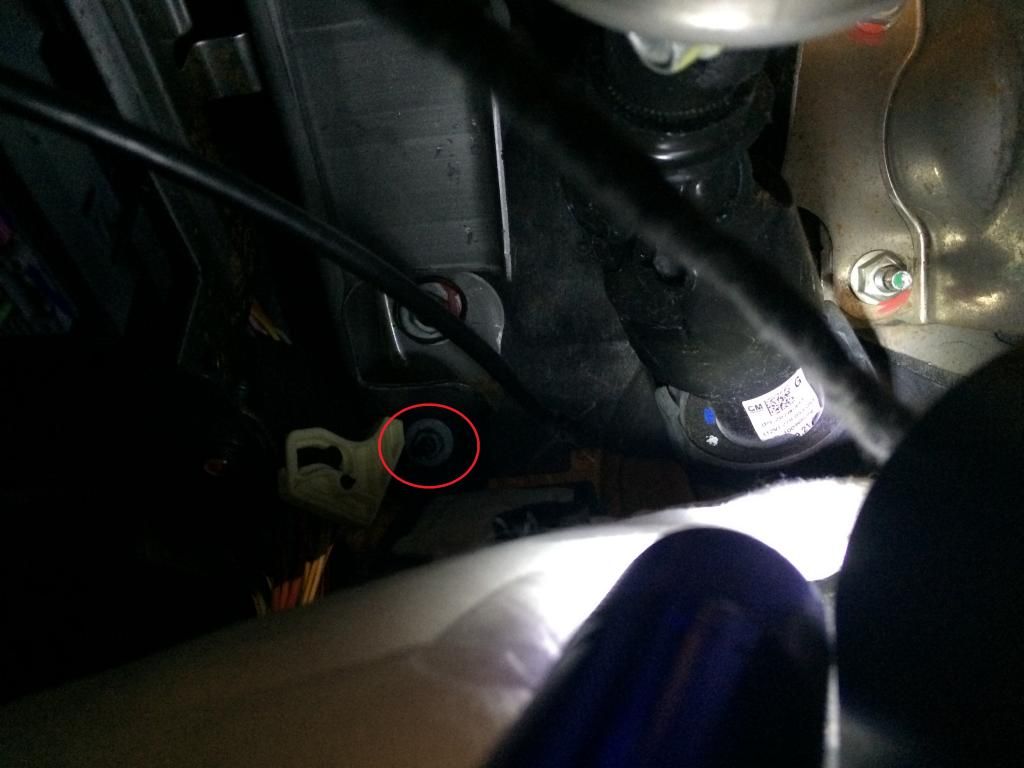
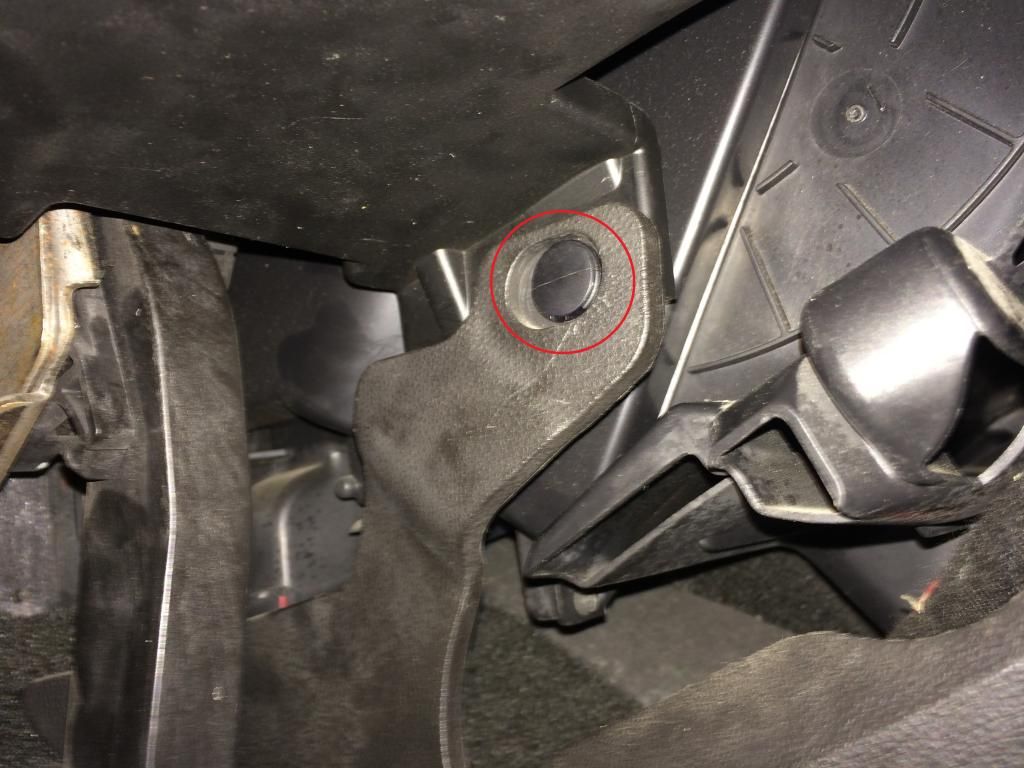
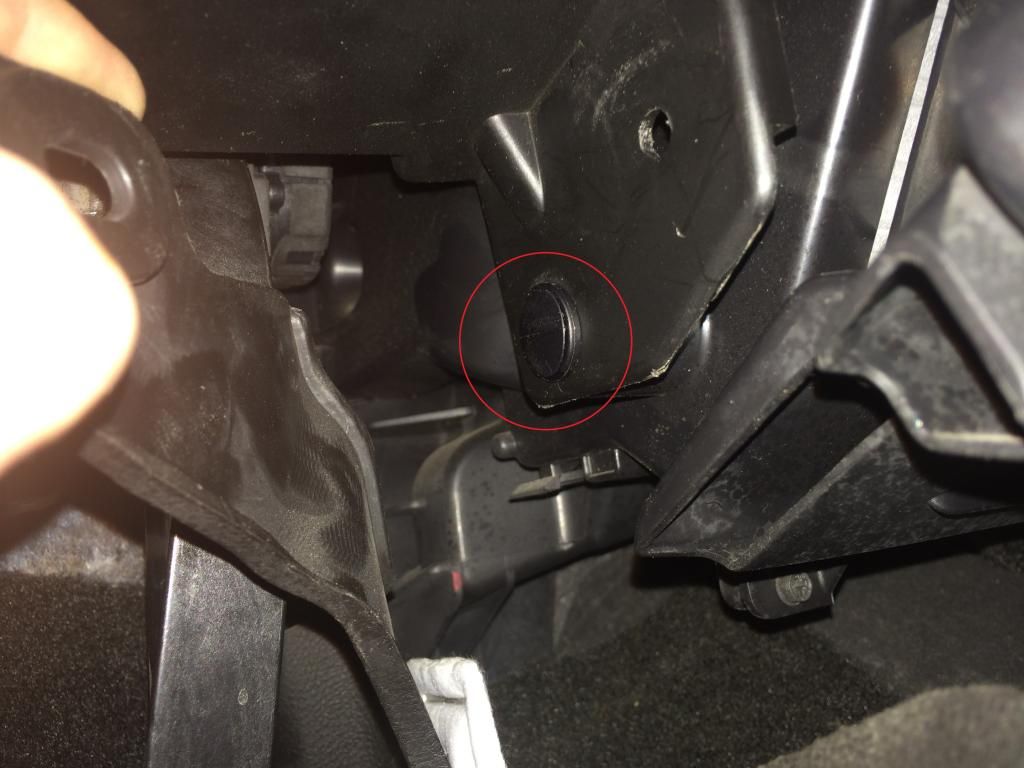
Here is where your yoga skills come into play. There are three screws holding the actuator into place. Two of them are somewhat easily accessible. The third one... will cause suicidal thoughts, sprained wrists, etc. Maybe there is an easier way, but I couldn't make it any easier. I don't have a picture of it, but the small 3" panel that the blue connectors are on has a small hole behind it. If you remove the upper bolt (the one you can't see in the previous picture), you can slide this panel enough to get a screwdriver through the hole for Screw #2. Screw number three (not visible in pictures) requires a lot of touch-n-go, bending and a 7mm socket or right-angle screw driver. May the force be with you.

The large white box with white sticker is the communications module BEFORE it was lowered.
GENTLY!!!! unplug and remove the actuator. Replace it with a new one. Mine was not properly aligned, so I stuck the actuator in the shaft and gently twisted it until the screw holes were lined up.
If you're smart, you'll plug everything electronic back in and test it. BUT FIRST! You must recalibrate the actuator. On the passenger side, remove BOTH fuses for HVAC (I think it was #12 and #21?). Insert ignition key and turn ignition on (don't start the car) and let it sit for 1 minute. Shut it off and replace the fuses. Start the car (if your battery is still alive) and test the modes. If it doesn't work... my condolences. If it works, hooray! Reverse the process and put it all back together.
Ice your bruises, shame the dog, return the teenager back to it's dungeon, and partake of the bountiful sandwich your thankful wife prepared for you after saving yourself a trip to the dealer.
I bid thee adieu.
The symptoms were buzzing, clicking and lack of ability to change modes for the HVAC. Eventually, we were stuck with defrost 24/7. The replacement was easy as far as what needs done, but difficult because of the confined space and the positions you have to put your body in. I'm sore from head to foot with bruises everywhere trying to figure out how to get this thing out. You will benefit from my pain! It wasn't too bad considering the dash didn't have to come out, but it was still no fun!
From start to finish, it took about 3 hours. If I did it again, i could do it in about half that time.
Tools needed:
1/4" Ratchet with 7mm and 10mm sockets and approx 8" extension
3/8" Ratchet with extension and 10mm deep socket. (depending on your sockets)
Stubby flat head screwdriver
Phillips screwdriver
Needle nose pliers
Small flashlight
A heck of a lot of patience and maybe a spare skinny teenager if your favorite topic is dessert! ;D
Using 7mm socket, remove two screws on either side of the drivers side knee panel. One near the OBDII port and the other on opposite side. When the screws are out, pull out horizontally (towards drivers seat) on all four corners and it will come loose. I left the hood release attached and set it aside hanging out of the door.
To remove the next panel holding the foot lamp, remove the screw in the middle using 7mm socket. In the picture, I already removed it. Once that screw is removed, squeeze the clips on either side of the panel and the front will come down.


Disconnect the light bulb connector.

Using a 10mm deep well socket, ratchet and extension (1/4" or 3/8" -- whichever works best for you), there is a nut all the way in the back against the firewall. Remove that nut.

On the right hand side of the panel will be one of GM's worst inventions. The plastic retainer! Maybe a GM rep will take my vin# and "make a note" that these pins are terrible ideas. Grab your flat head screwdriver and pry out the middle pin half way. There is usually a small slot that your screwdriver will fit in. Use needle nose pliers to remove the rest of the pin.

Gently bend that panel back and you'll find yet another, more challenging retainer pin! Curse the General Motors namesake and it's designers. Then remove the second retainer pin.

The panel should now be completely free. Gently remove it and place it somewhere where your dog doesn't run off with it and pee on it. It does have a bending point in it for what I assume is easier removal around the e-brake.
Remove 4 bolts holding the metal knee bolster on. Also place in secure location from urinating dogs/children.

Now... here is where we start the fun part! If needed, this is a good time to stretch, practice yoga, or release your flexible teenager from the dungeon. If you don't have access to said resources, take a deep breath while trying not to inhale a year worth of McDonald's French Fries, goldfish and 5lbs of road salt. For me, it worked best if I had the driver's seat as flat as it could go and laid on it backwards. Head resting against brake pedal and feet resting on the headrest (BAHAHA! get it? Headrest? Feet?....)
Using 10mm socket, remove two bolts holding the communications module in place.

If you can, GENTLY disconnect the two square, blue wiring connectors. If they don't budge easily, leave them alone. This is your NAV, bluetooth, radio, on star, etc. Once the two bolts are removed, the module will be able to slide down. It will not come all the way out because there are more wire harnesses at the top side. Just slide it out 4-5 inches and let it chill.
Here is where your yoga skills come into play. There are three screws holding the actuator into place. Two of them are somewhat easily accessible. The third one... will cause suicidal thoughts, sprained wrists, etc. Maybe there is an easier way, but I couldn't make it any easier. I don't have a picture of it, but the small 3" panel that the blue connectors are on has a small hole behind it. If you remove the upper bolt (the one you can't see in the previous picture), you can slide this panel enough to get a screwdriver through the hole for Screw #2. Screw number three (not visible in pictures) requires a lot of touch-n-go, bending and a 7mm socket or right-angle screw driver. May the force be with you.

The large white box with white sticker is the communications module BEFORE it was lowered.
GENTLY!!!! unplug and remove the actuator. Replace it with a new one. Mine was not properly aligned, so I stuck the actuator in the shaft and gently twisted it until the screw holes were lined up.
If you're smart, you'll plug everything electronic back in and test it. BUT FIRST! You must recalibrate the actuator. On the passenger side, remove BOTH fuses for HVAC (I think it was #12 and #21?). Insert ignition key and turn ignition on (don't start the car) and let it sit for 1 minute. Shut it off and replace the fuses. Start the car (if your battery is still alive) and test the modes. If it doesn't work... my condolences. If it works, hooray! Reverse the process and put it all back together.
Ice your bruises, shame the dog, return the teenager back to it's dungeon, and partake of the bountiful sandwich your thankful wife prepared for you after saving yourself a trip to the dealer.
I bid thee adieu.


